Do Not Sacrifice Without Adequate Reason
Move 1: e4, e5
Controlling the center with our pawns.
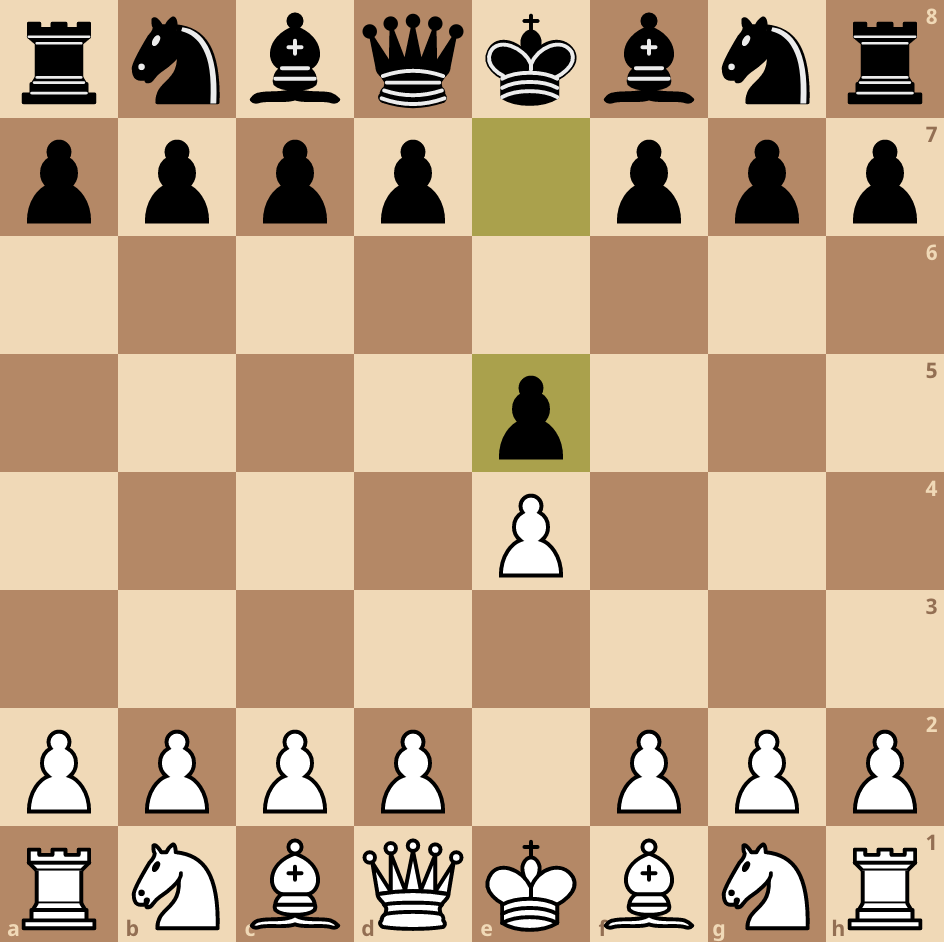
move 2: f4, exf4
Morphy chooses the King’s Gambit opening. A very aggressive opening, but it also risks a terrible result.
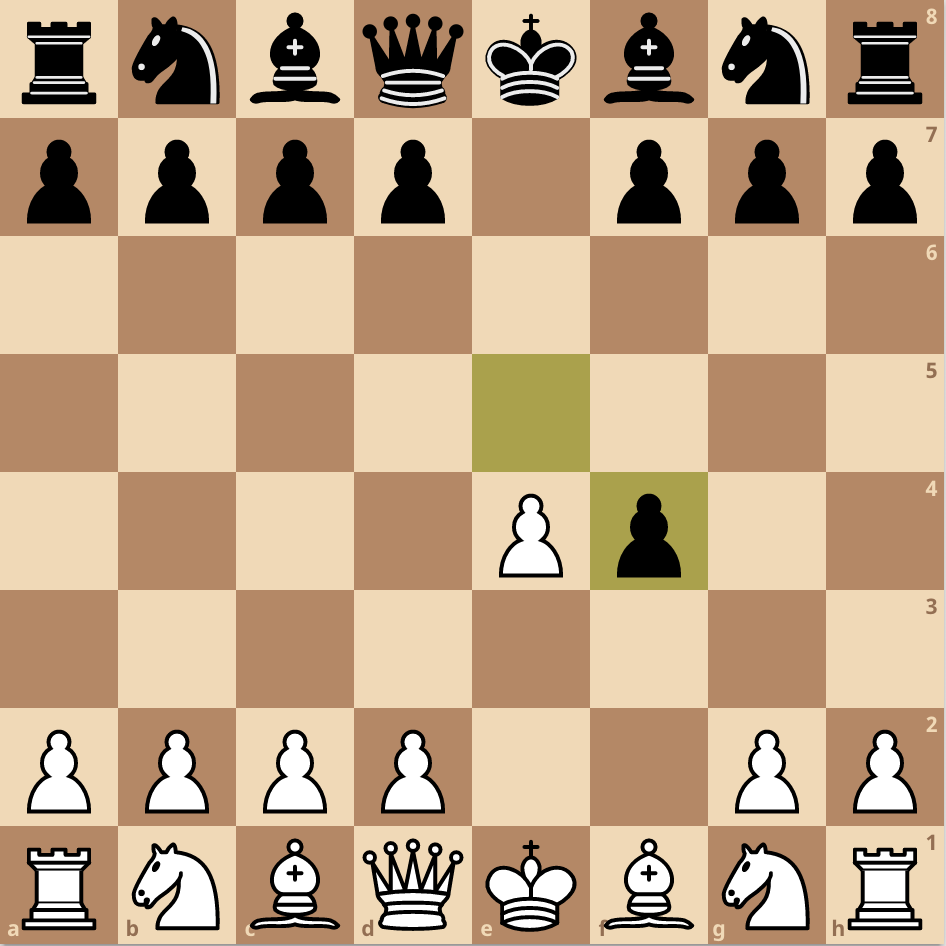
Move 3: Nf3, c6
Morphy keeps getting his pieces out while Black makes a pawn move that prepares d5. White’s move is more energetic and is one of the best responses to the situation.
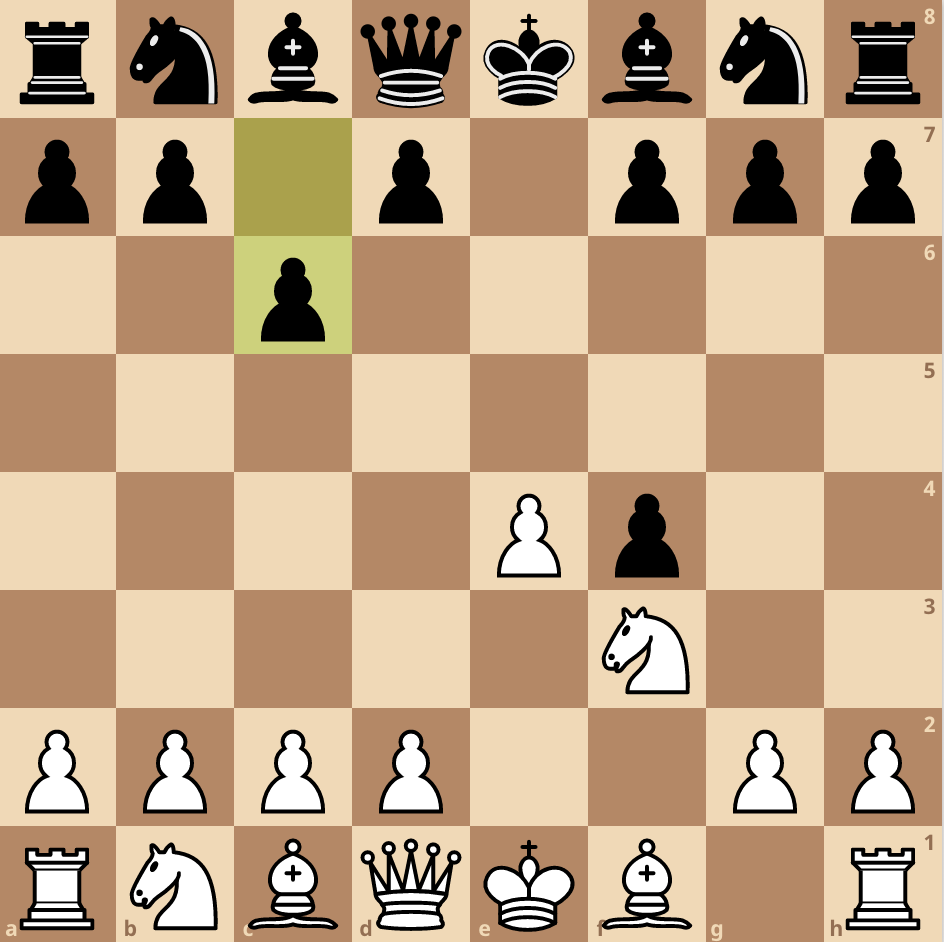
Move 4: Nc3, Bb4
Both knights are out and black brings his bishop. Do not forget our previous rules! Develop knights before bishops.
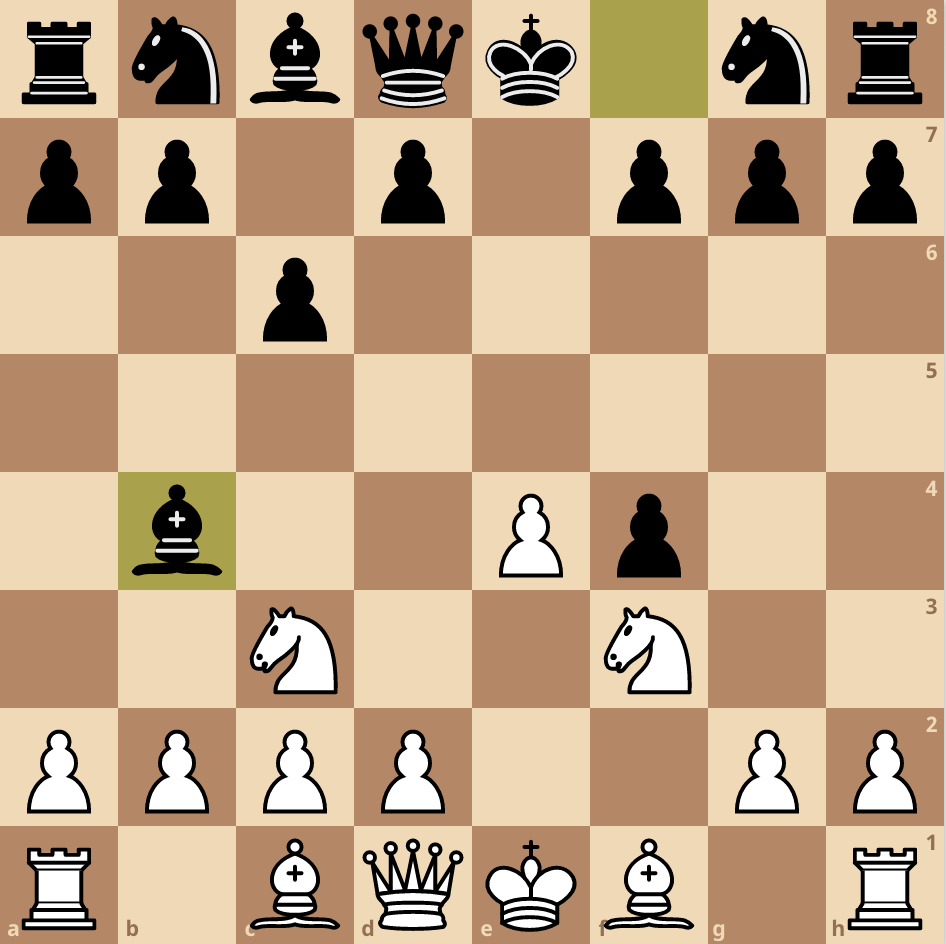
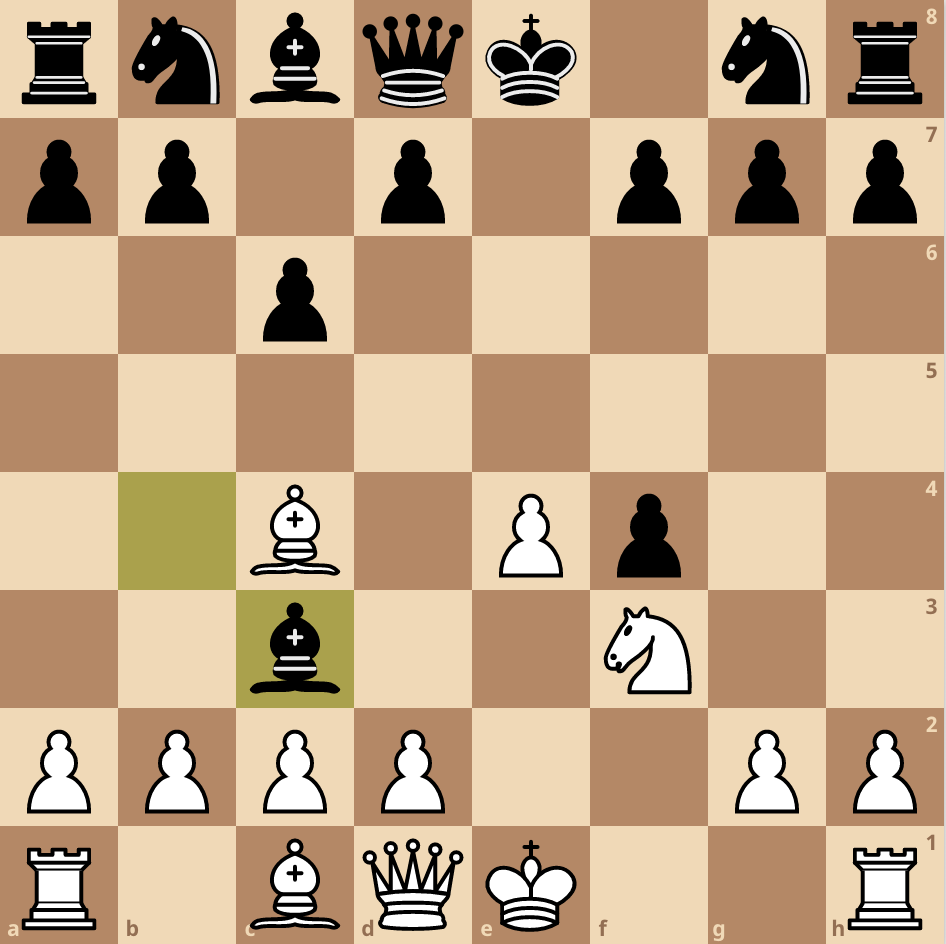
Move 5: Bc4, Bxc3
Another good move for white, developing his bishop and stopping d5 as white as more attackers than defenders. Bad move for black because he loses the bishop pair.
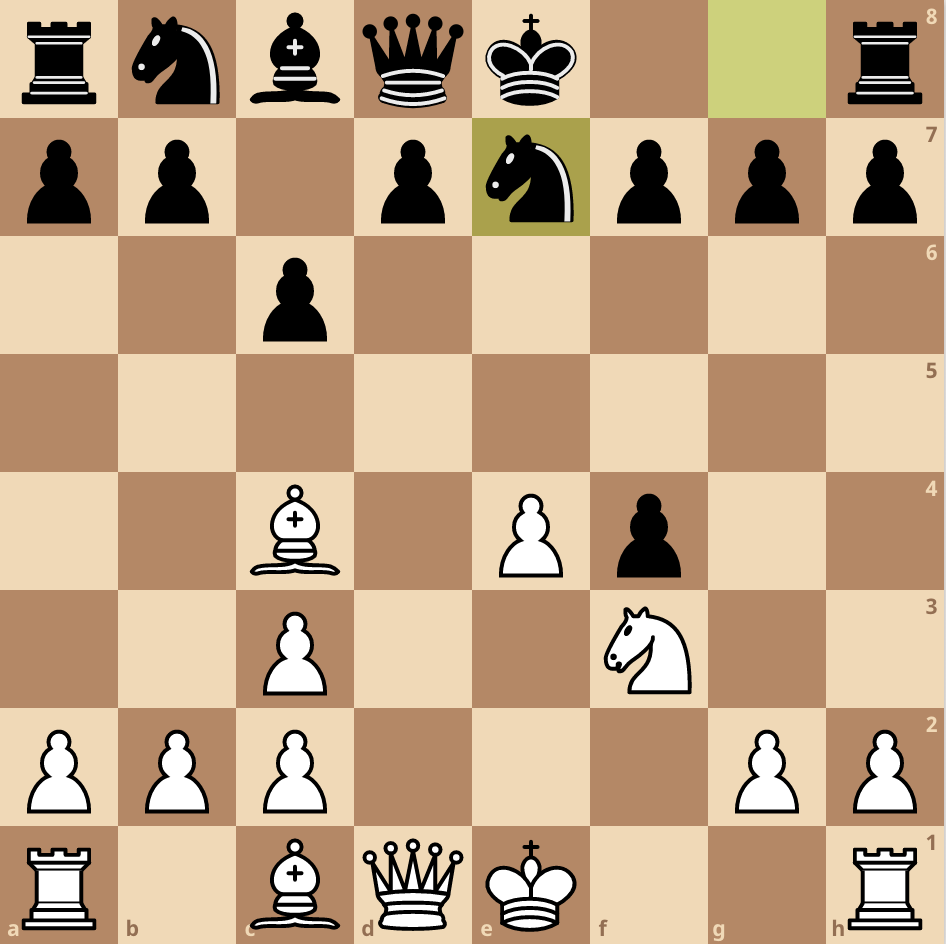
Move 6: dxc3, Ne7
White captures with the d-pawn to open up the bishop and queen.
Chess Question: Why didn’t Black play Nf6?
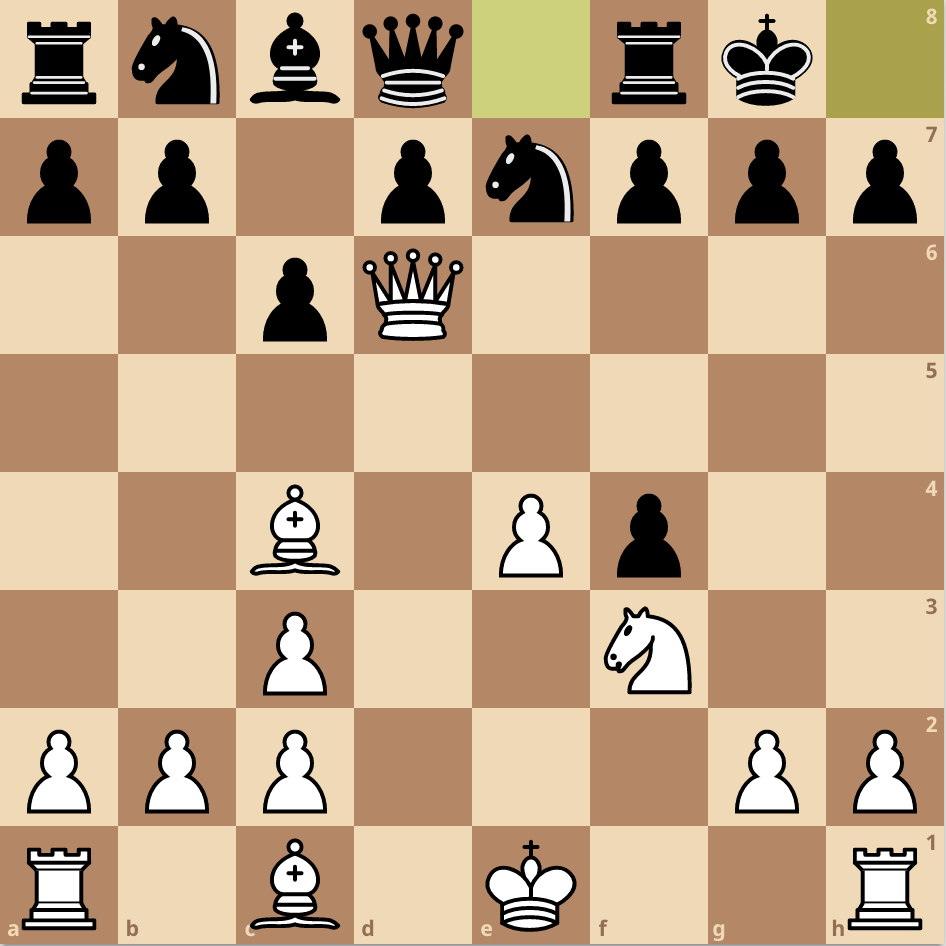
Move 7: d6, O-O
Morphy makes another great move which blocks the d-pawn from moving for black.
Chess Question: Why is it important that the d-pawn cannot move?
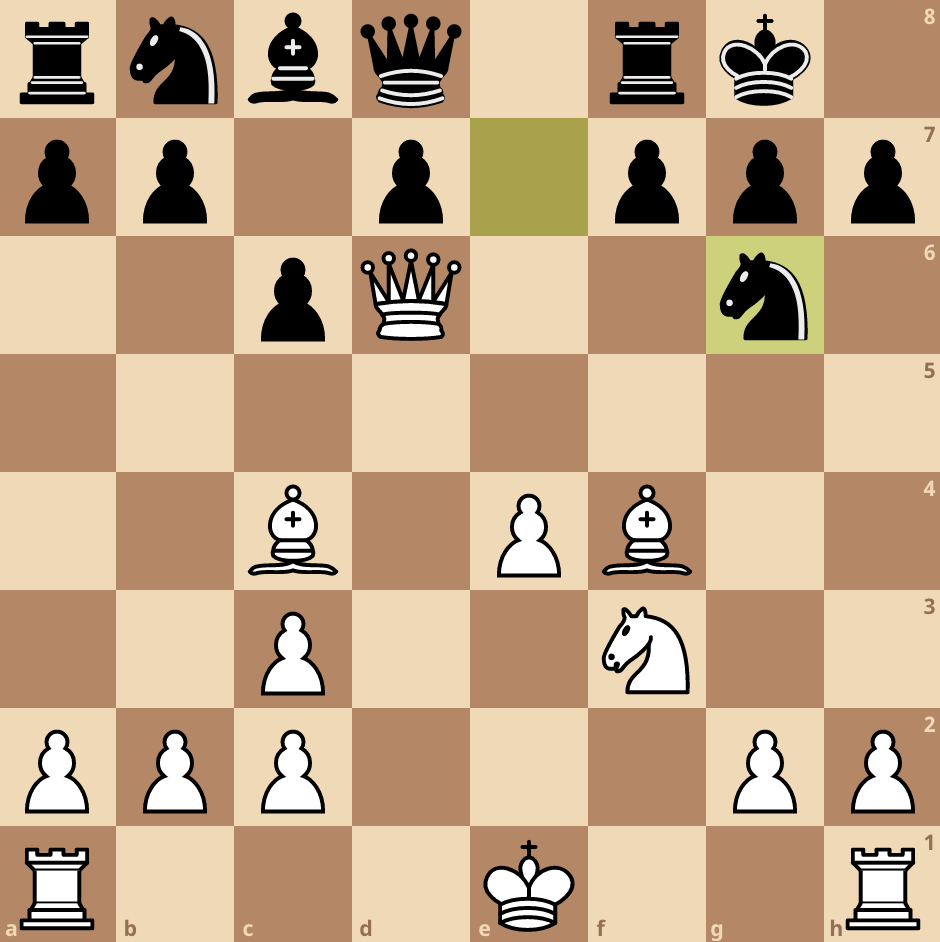
Move 8: Bxf4, Ng6
Morphy gets his last minor piece (knights and bishops) and wins a pawn. Black tries to get his knight active and attacks the bishop.
Move 9: Bg5, Qe8
The best defense is a counterattack. White threatens the black queen in response to the black knight’s attack.
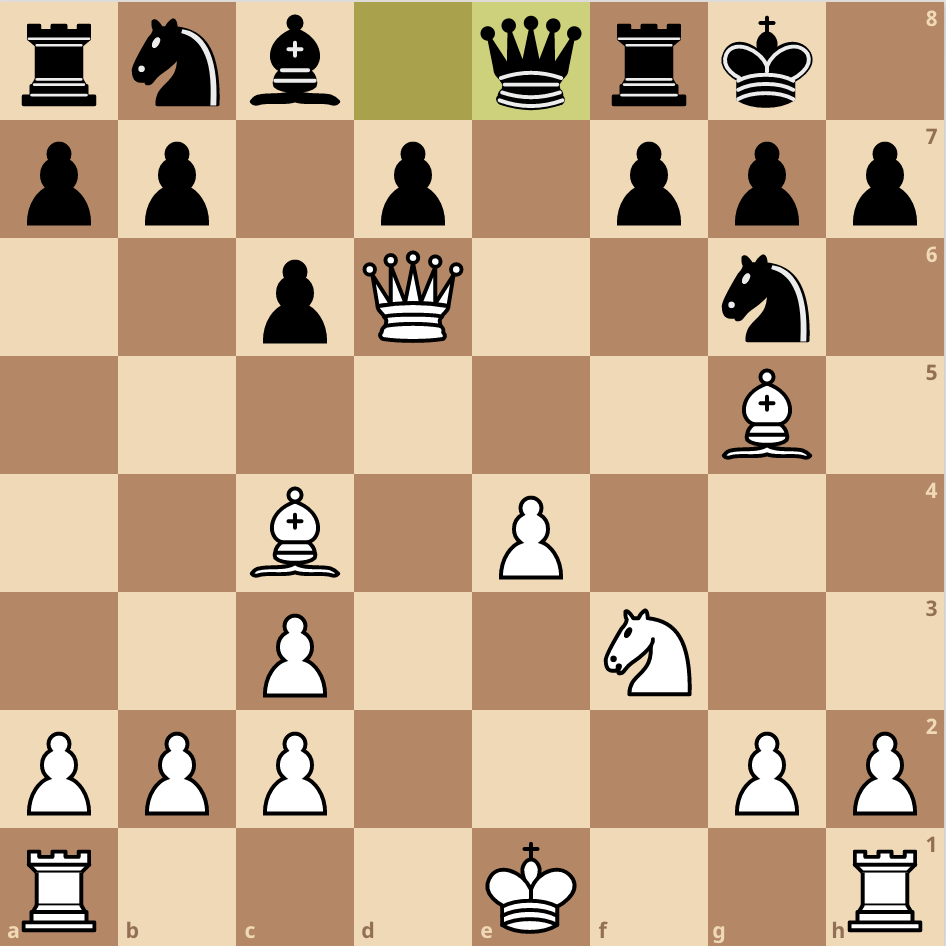
Move 10: O-O, Kh8
Get your king castled as soon as possible. Morphy delayed castling because he has full control over the center and wants to be flexible.
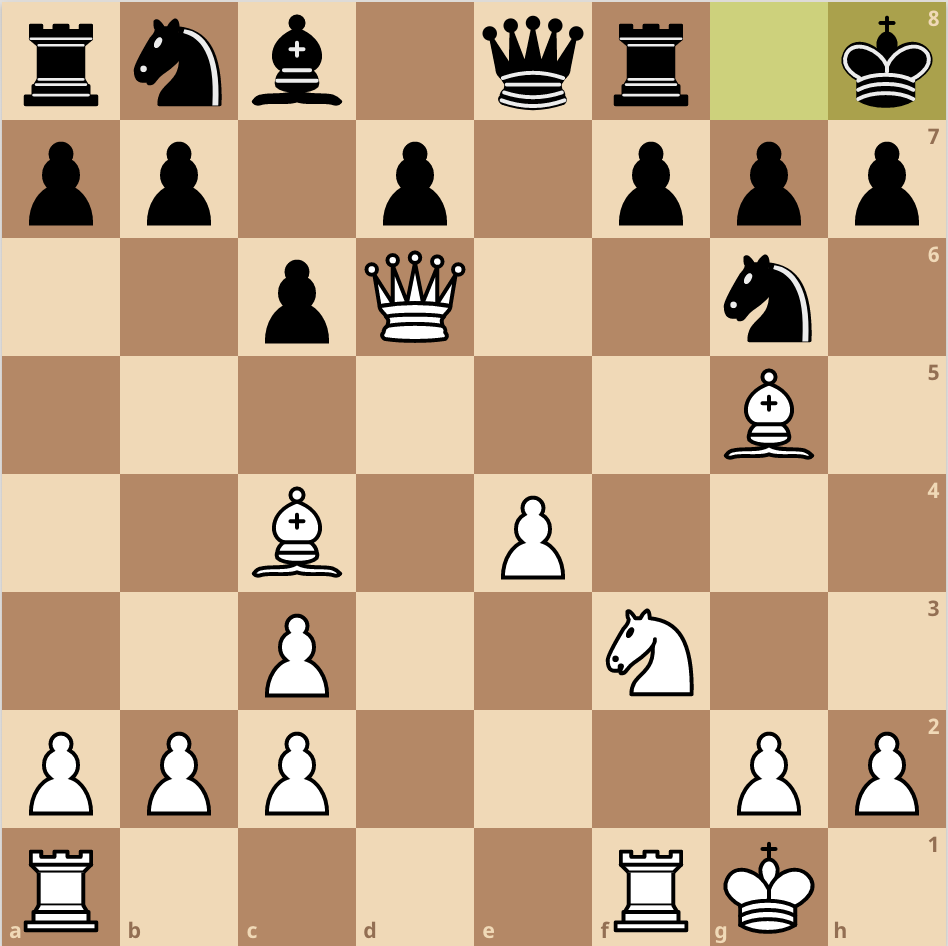
Move 11: Rae1, f6
White gets his lasy heavy piece active and puts the rook in the center where it is the most useful.
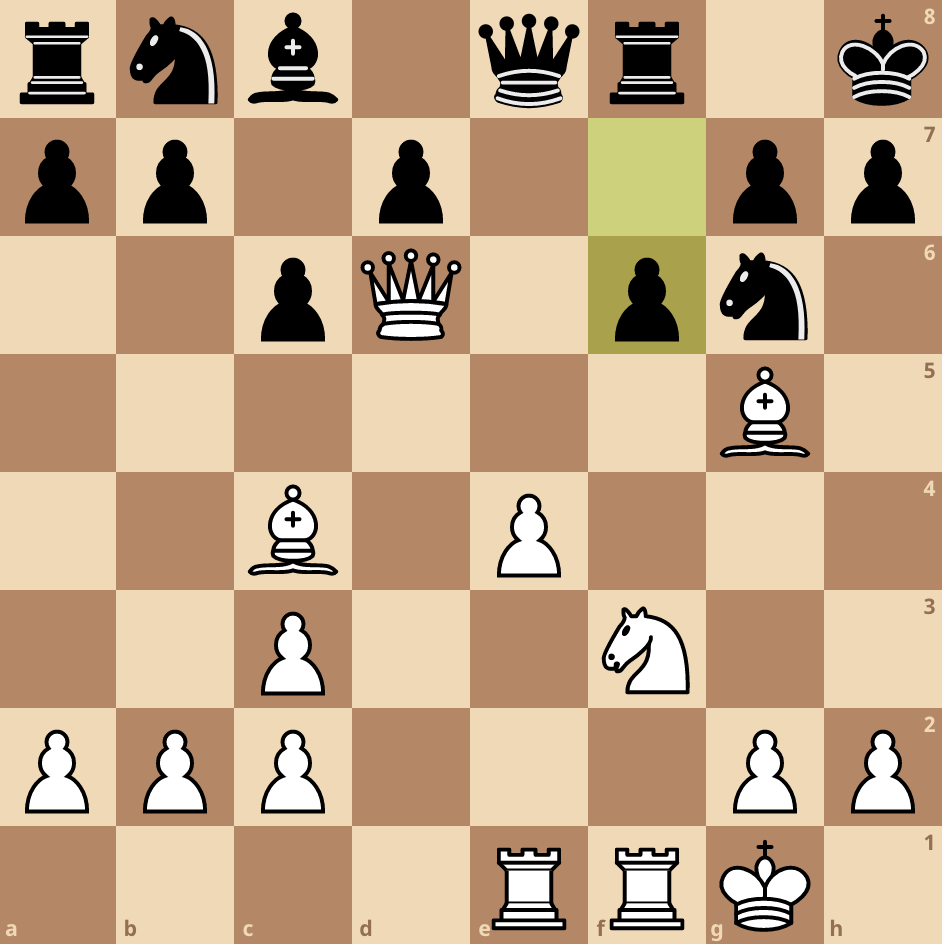
Move 12: e5, f5
Now that white is fully developed and all pieces are ready, it’s time to open up the center! Opening up the center means making pawn exchanges which helps your pieces control more squares.
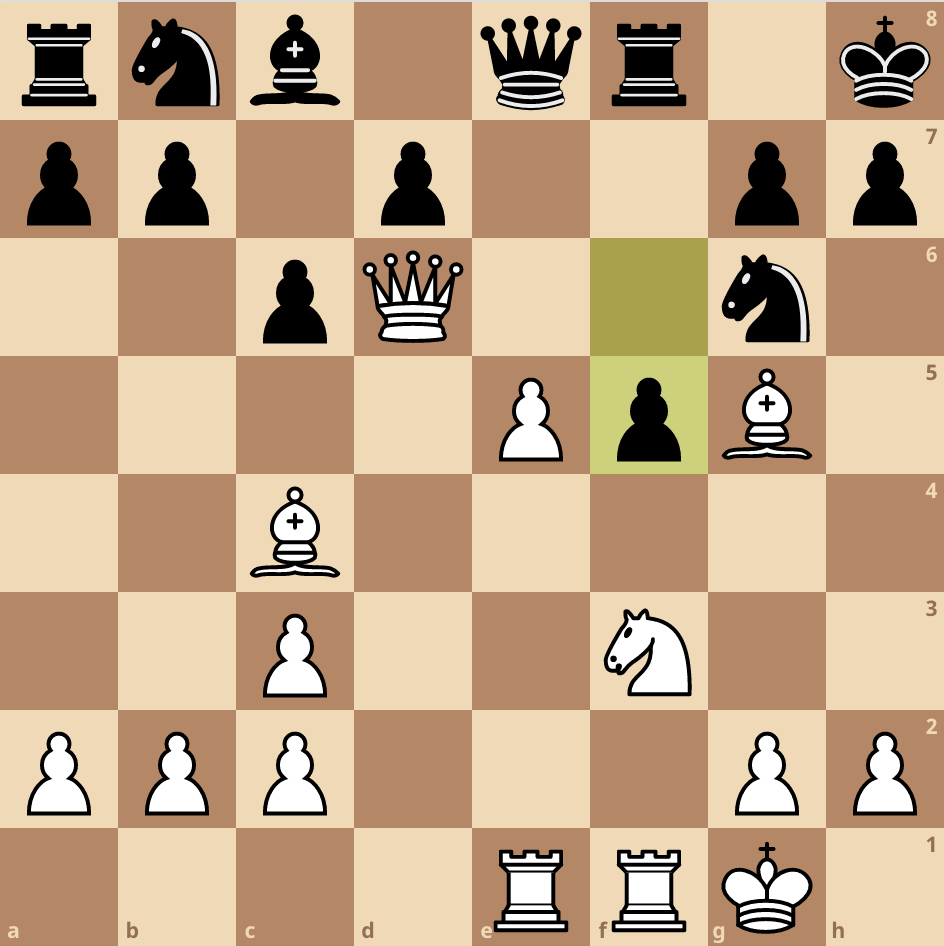
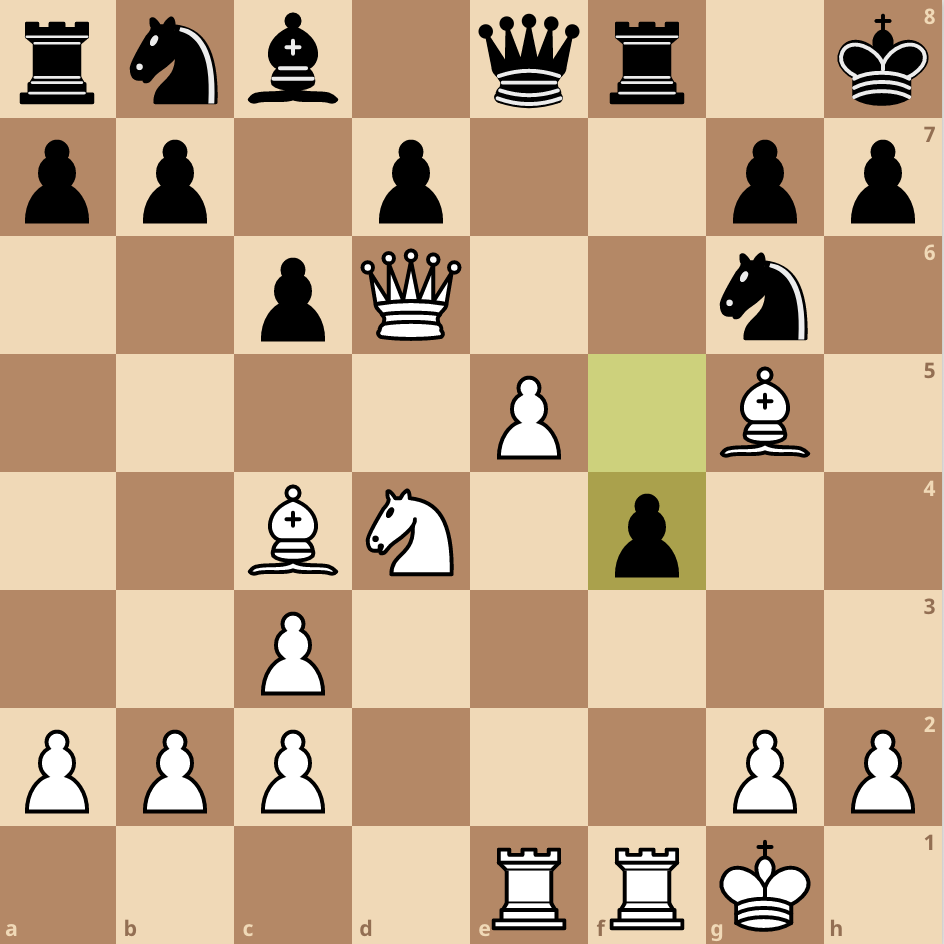
Move 13: Nd4, f4
Slowly moving his pieces forward and letting both rooks control open files. The pawn is forced forward to be defended, but is now behind enemy lines.
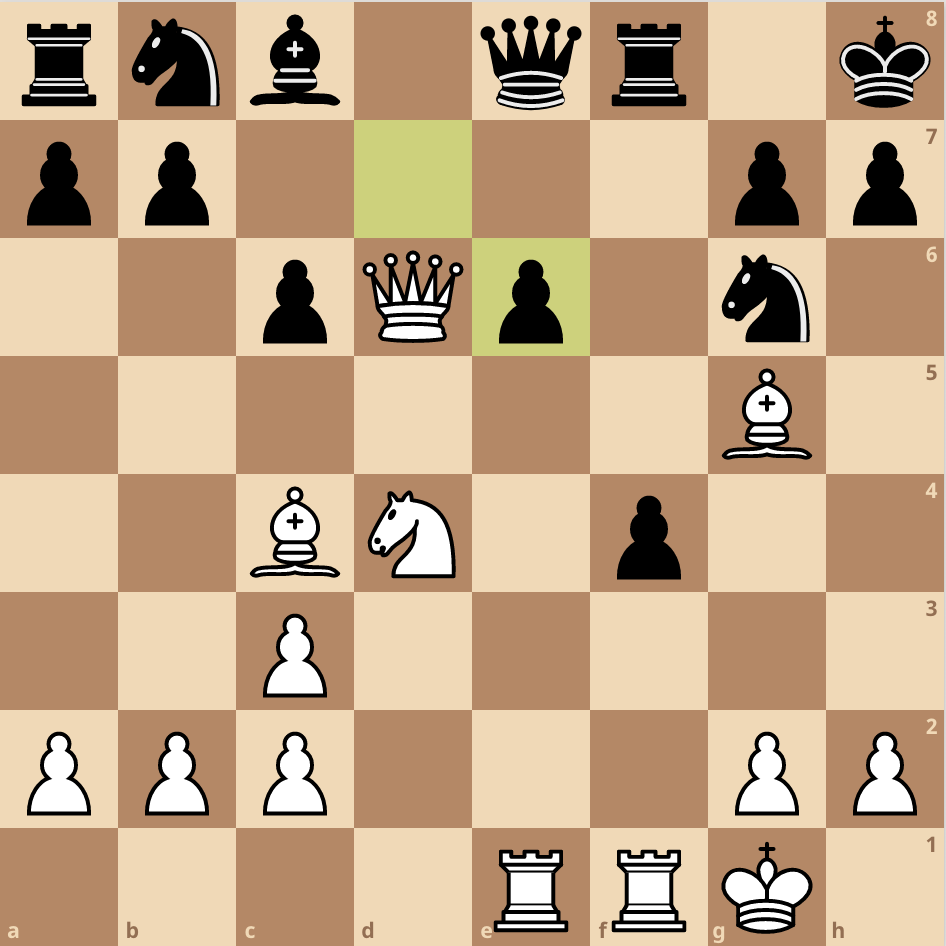
Move 14: e6, dxe6
Pushing forward the pawn and making pawn trades which lets Morphy make more attacks with his pieces and looking for back rank checkmate ideas.
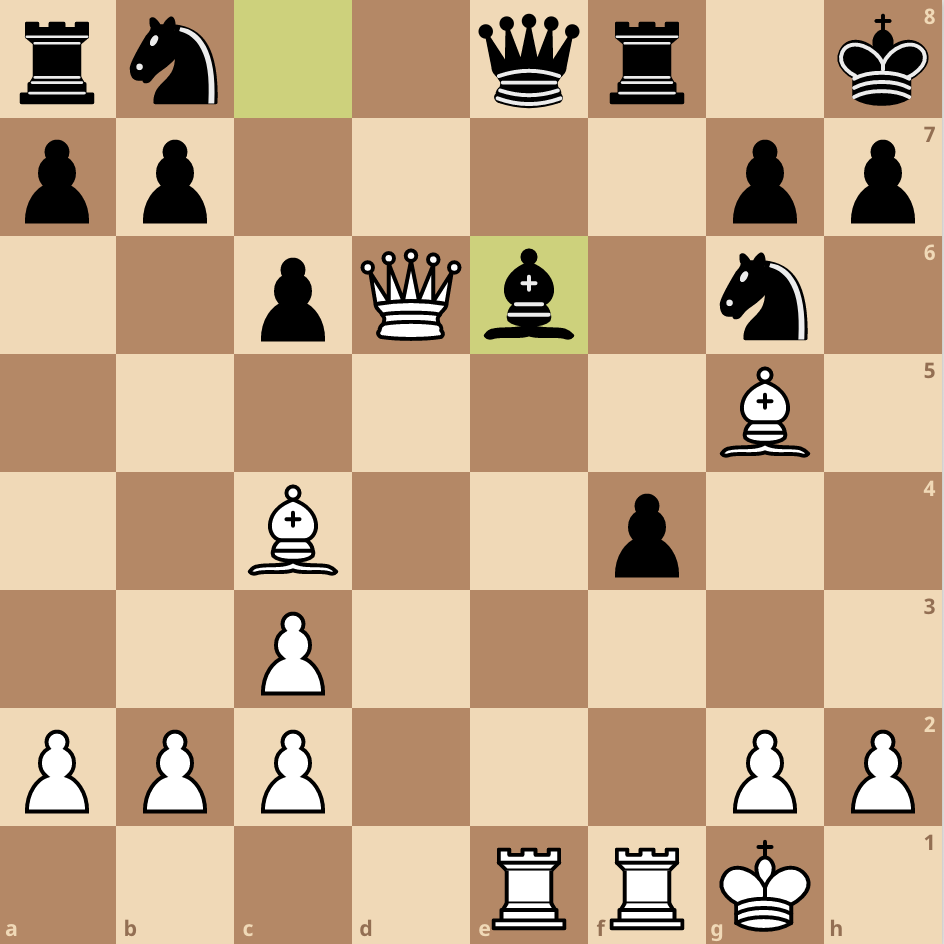
Move 15: Nxe6, Bxe6
The knight was too strong on e6, so the bishop trades itself for its active counterpart. However, this trade brings in a new strong piece. White outnumbers the black army on the kingside and the game ends fast.
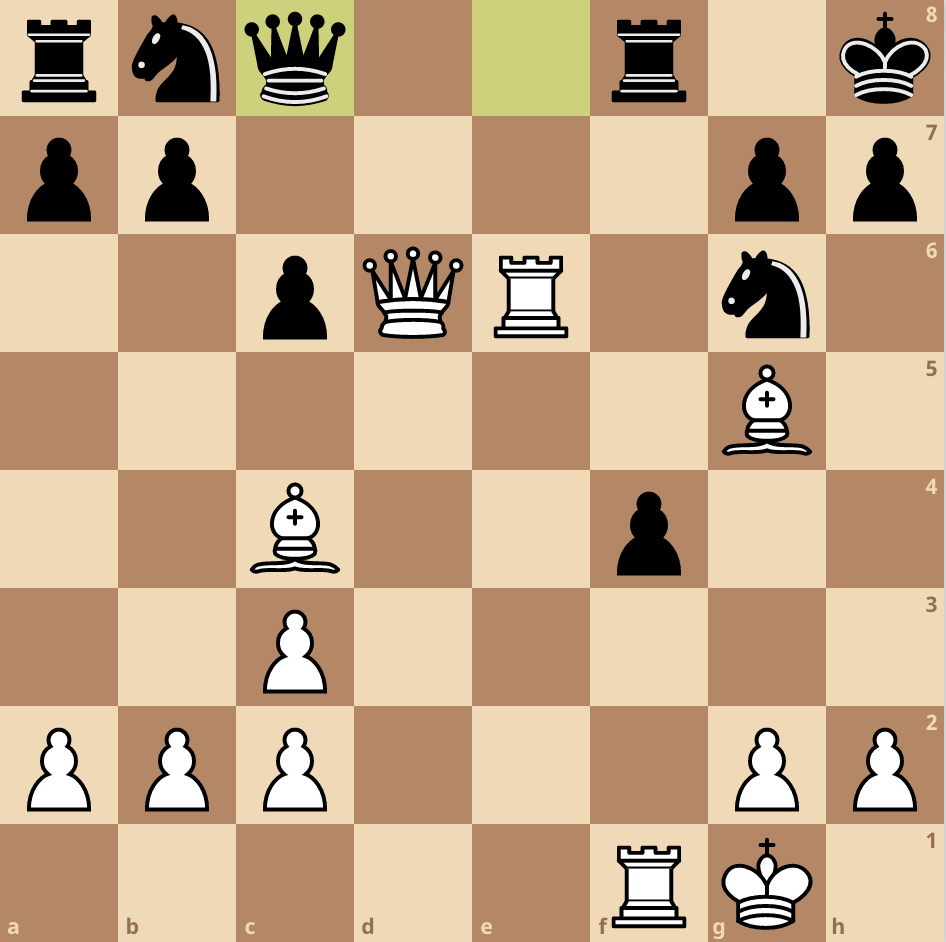
Move 16: Rxe6, Qc8
The rook comes in and attacks the queen which does not have a good square. The queen is forced to the queenside for safety and white is ready for the final assault on the black king.
Move 17: Rxg6, hxg6
Morphy spots a checkmate pattern the “Greco’s Checkmate”. This sacrifice weakens the black King’s defense and gets Morphy closer to checkmate.
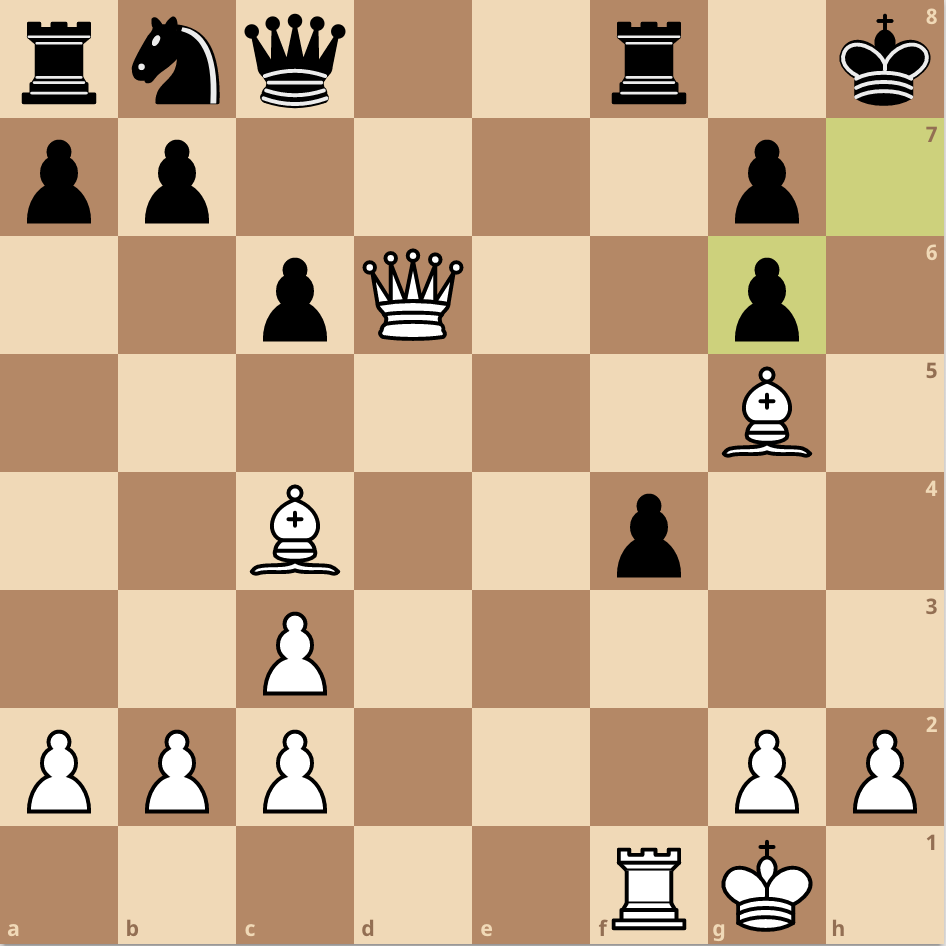
Move 18: Qg6, Qf5
White is now threatening Qh5 checkmate, so Black plays Qf5 to have the h7 defense.
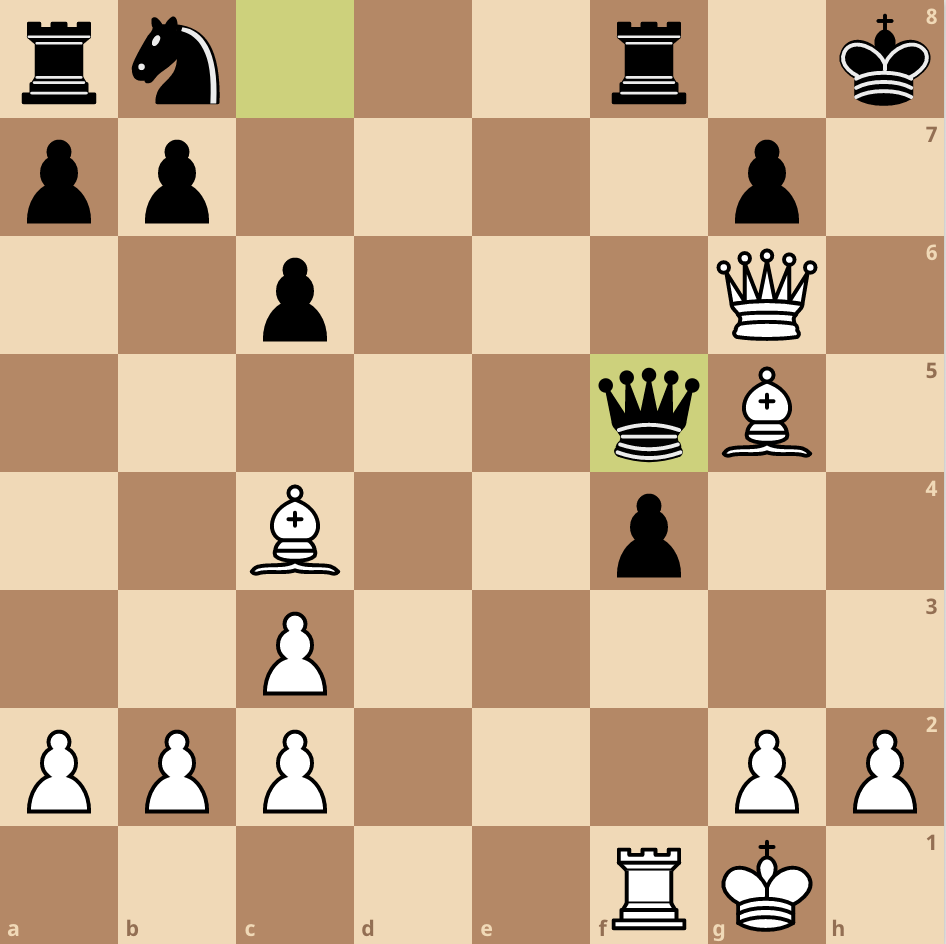
Move 19: Rxf4, Qg6
Another sound sacrifice which forces the game into trades and a lost endgame. Black has to accept the sacrifice again because the rook on f8 is undefended Black does not want to give away the queen for the bishop and rook.
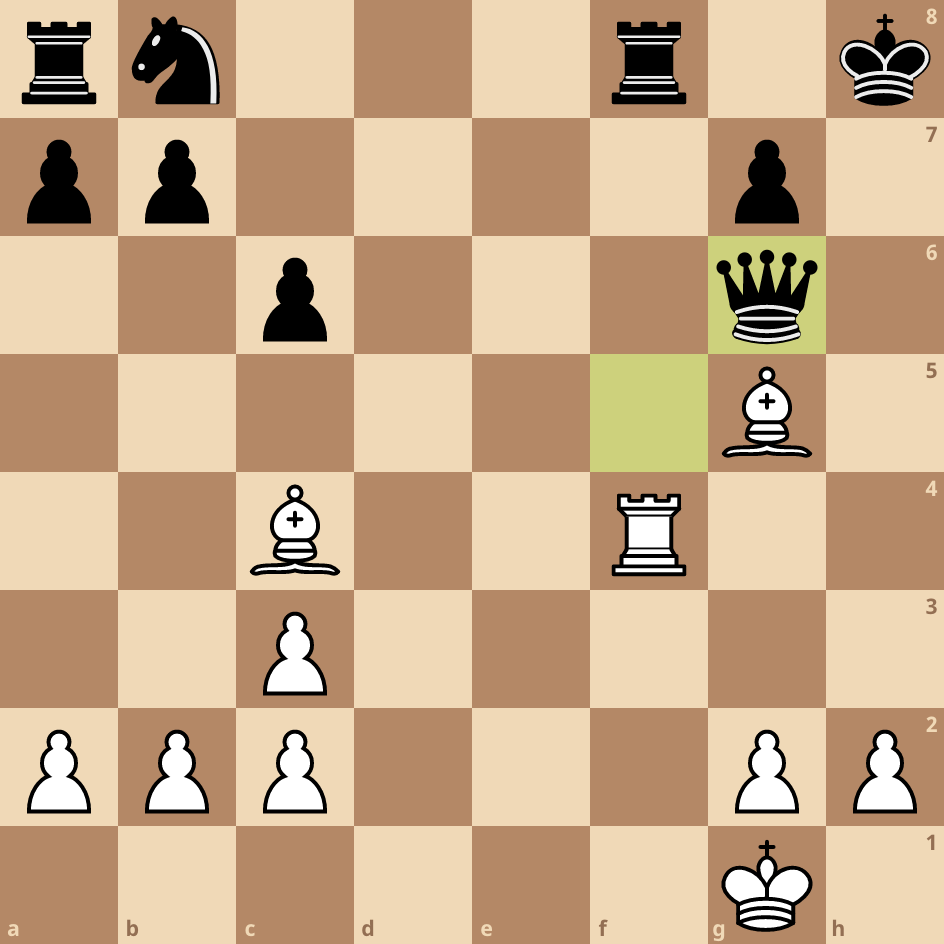
Move 20: Rxf8+, Kh7
Now, white is able to win the queen back and have a winning pin at the end of the game.
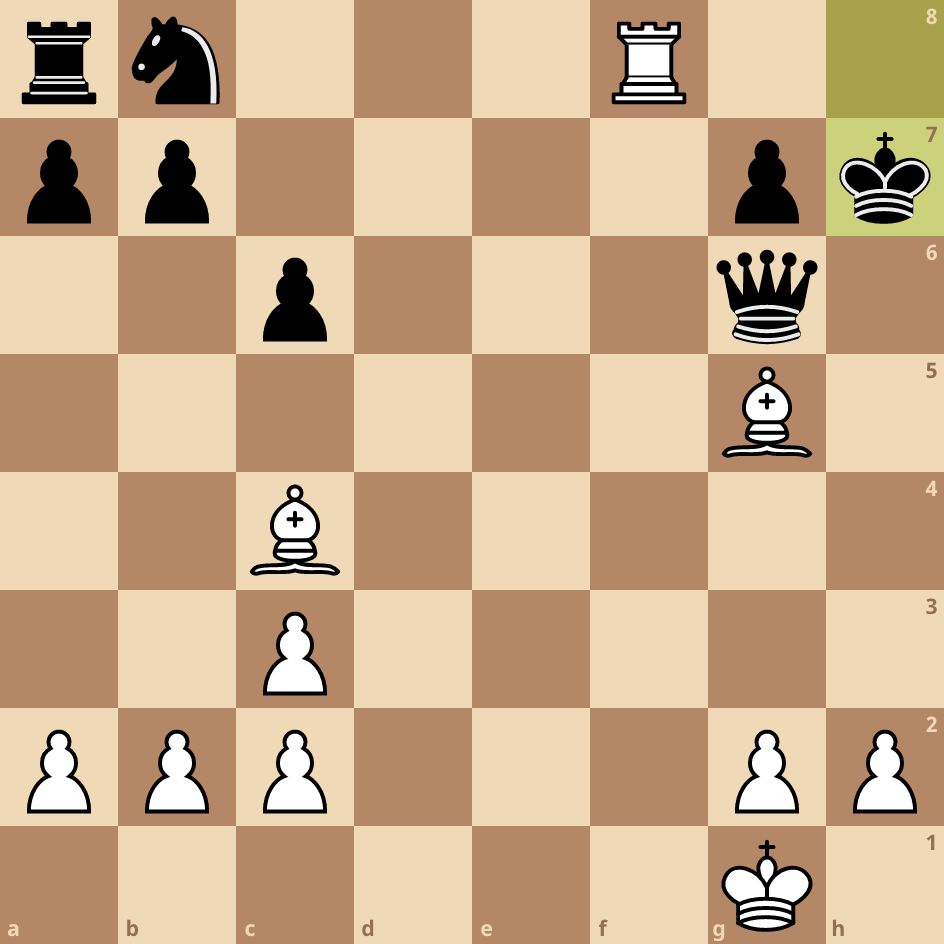
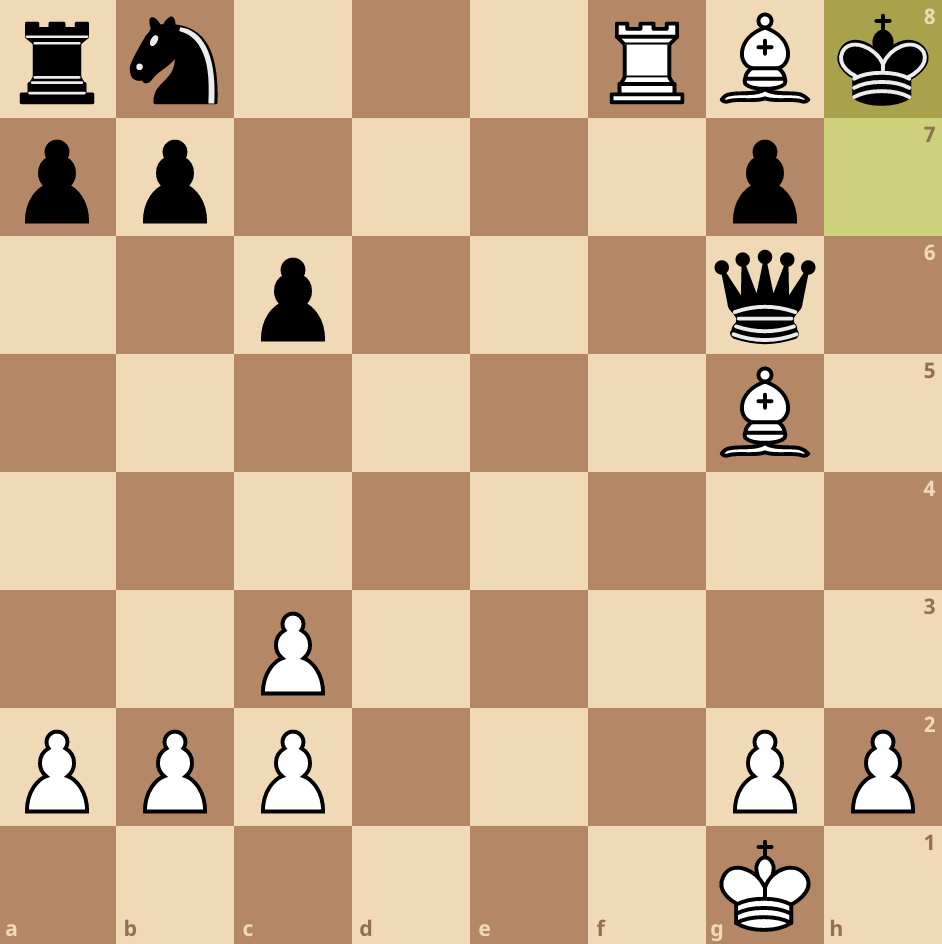
Move 21: Bh8+, Kh8
Bd3 also wins the queen for a bishop, but Morphy enjoys forced moves with checks. This is usually the best route as there is no good choice for your opponent.
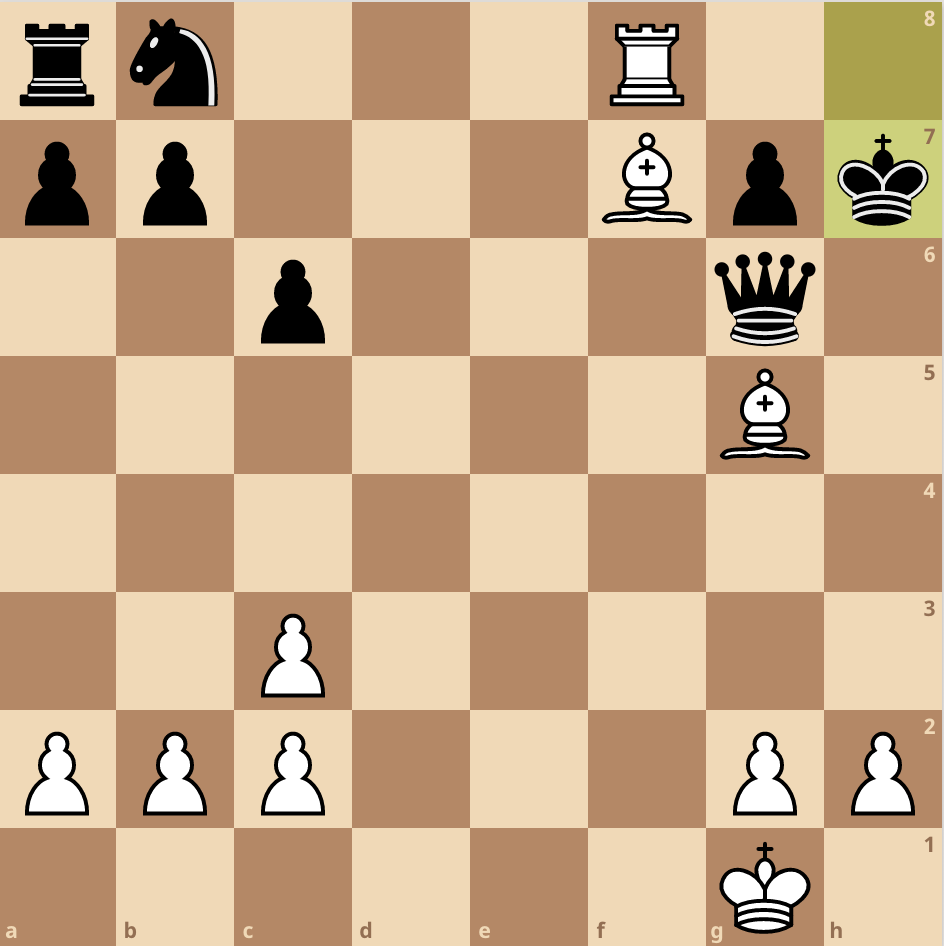
Move 22: Bf7+, Kh7
A discovery check that wins the queen. Black is forced to lose the queen because the king and queen are both being attacked. Black must get his king to safety because he is in check.
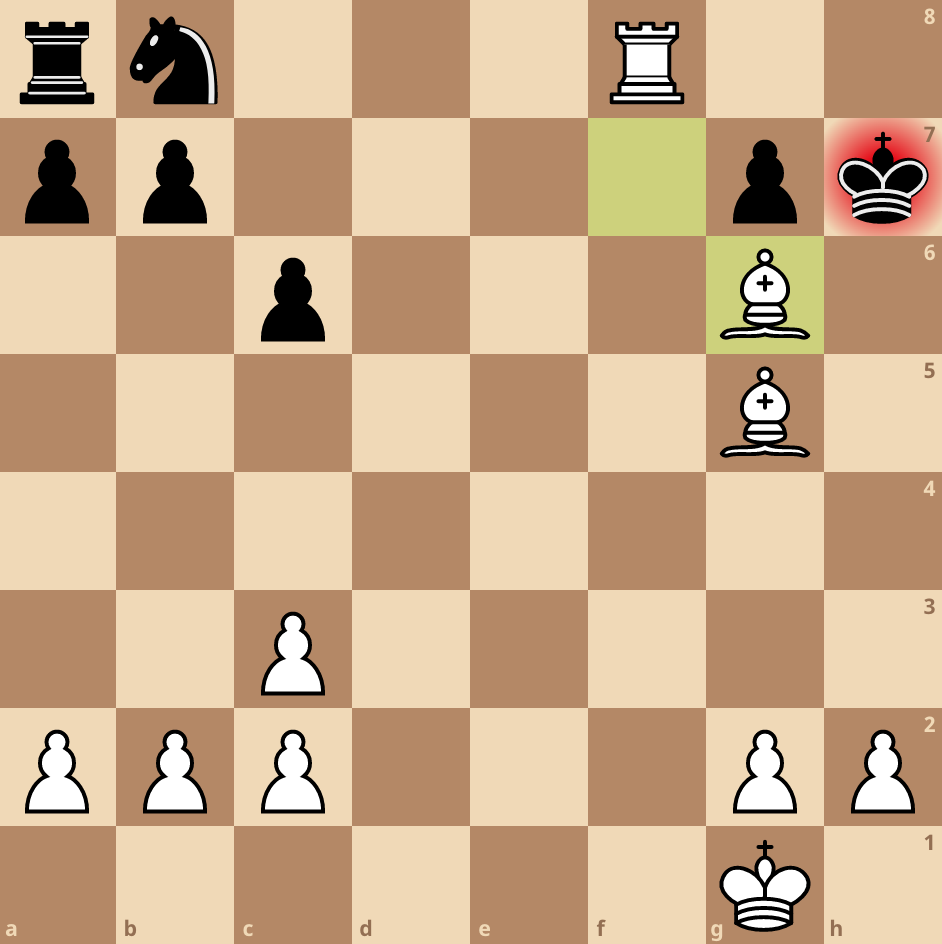
Move 23: Bxg6
After Kxg6, Morphy will play Bf4 and the knight is pinned. If he moves the knight, he will lose his rook. So Black must lose his knight and the game is lost.
